Section author: Danielle J. Navarro and David R. Foxcroft
Analyses
Analyses can be selected from the Analyses ribbon (activate it by clicking
the Analyses-tab at the top of the jamovi window). Here, individual
analyses can be chosen from their respective category (e.g., T-Tests,
ANOVA or Regression). Selecting an analysis will present an options
panel for that particular analysis, allowing you to assign different
variables to different parts of the analysis, and select different options. At
the same time, the results for the analysis will appear in the right results
panel and will update in real-time as you make changes to the options.
When you have the analysis set up correctly you can dismiss the analysis options by clicking the arrow to the top right of the options panel. If you wish to return to these options, you can click on the results that were produced. In this way, you can return to any analysis that you (or say, a colleague) created earlier.
If you decide you no longer need a particular analysis, you can remove
it with the results context menu. Right-clicking on the analysis results
will bring up a menu and by selecting Analysis and then Remove the
analysis can be removed. But more on this later. First, let’s take a
more detailed look at the spreadsheet view.
Copy and Paste
jamovi produces nice tables and attractive plots that are formatted in
accordance with the American Psychological Association (APA) Publication
Manual. A very useful feature of jamovi is the opportunity to be able to
directly copy and paste these, perhaps into a Word document, or into an email
to a colleague. To copy results right click on the object of interest and
from the menu select exactly what you want to copy. The menu allows you
to choose to copy only the image or the entire analysis. Selecting
Copy copies the content to the clipboard and this can be pasted into
other programs in the usual way. You can practice this later on when we
do some analyses.
Syntax mode
jamovi also provides an syntax mode. In this mode jamovi produces
equivalent R code for each analysis. To change to syntax mode, select
the settings menu (⋮; top right corner in jamovi) and click the
Syntax mode checkbox there. You can turn off syntax mode by clicking
this a second time.
In syntax mode analyses continue to operate as before but now they
produce R syntax. Like all results objects in jamovi, you can right click
on these items (including the R syntax) and copy and paste them, for example
into an R session. To import jamovi-files within an R session, you can use
the function read_omv from the R-package jmvReadWrite (which can be
installed using install.packages("jmvReadWrite") in an R-session. The
package also contains further functions for handling jamovi-files in R (e.g.,
write_omv for writing jamovi-files, convert_omv for converting other
file formats to a jamovi-file, or merge_cols_omv for adding columns from
a second dataset while matching the two datasets by an index variable). Help
how to use these functions can be obtained by preceding the function name by
a ? (e.g., ?jmvReadWrite::read_omv).
Installing add-on modules into jamovi
A really great feature of jamovi is the ability to install add-on modules from the jamovi library. These add-on modules have been developed by the jamovi community, i.e., jamovi users and developers who have created special software add-ons that do other, usually more advanced, analyses that go beyond the capabilities of that come included with jamovi (although these analyses already cover the perhaps 95% of analyses you would run within psychology).
To install add-on modules, just click on the large + in the top right
of the jamovi window, select jamovi library and then browse through
the various add-on modules that are available. Choose the one(s) you
want, and then install them (as shown in Fig. 6).
It’s that easy. The newly installed modules can then be accessed from the
Analyses ribbon or by clicking on the the large + and the selecting
the analyses you need from the menu that opens.[1] Try it… useful add-on
modules to install include scatr (added under Descriptives) and Rj.
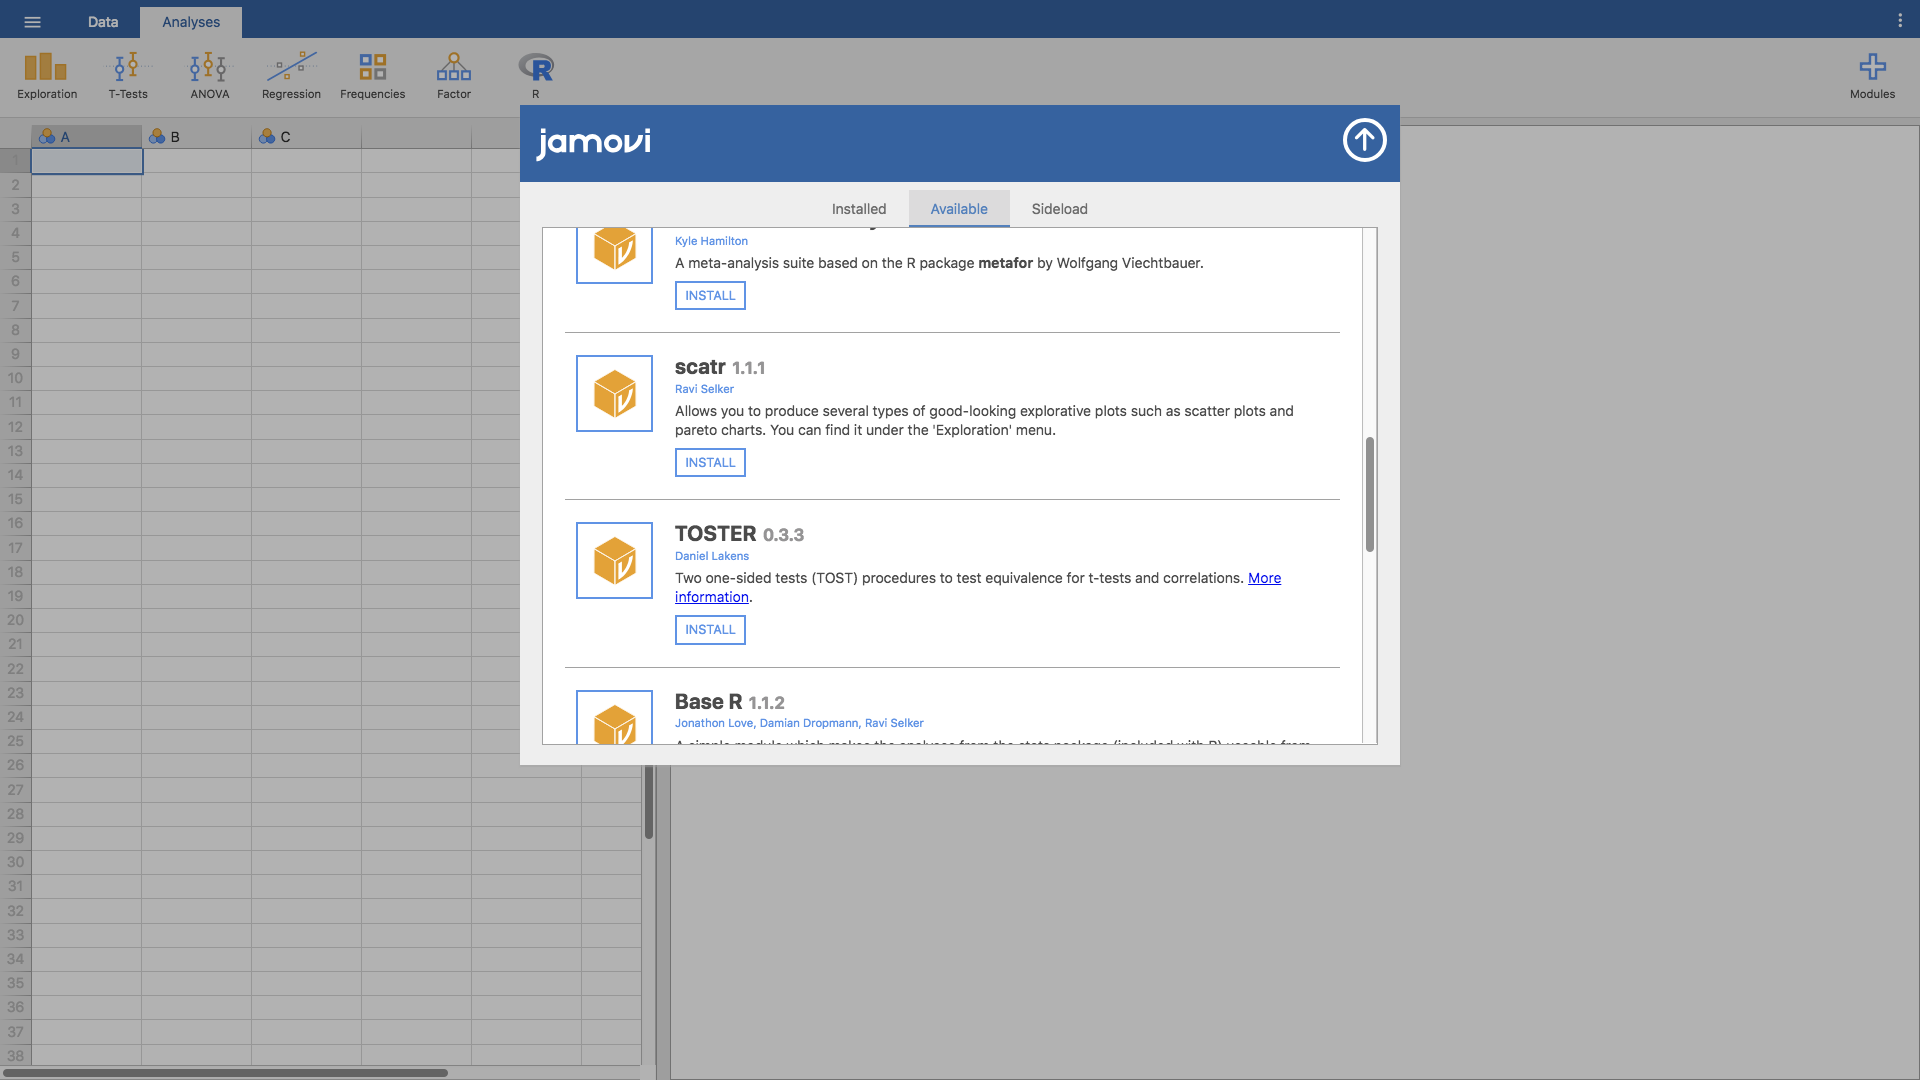
Fig. 6 Installing add-on modules in jamovi
| [1] | Especially if you install many modules, your Analyses ribbon may get
cluttered. You can avoid that by “hiding” modules that you don’t use that
often. In order to do this, go to the large +, and then on Manage
installed where you then can Hide modules from the Analyses
ribbon. You can still access them via the large +. Once you open it,
a menu appears, listing all your modules and giving you access to the
analyes within the module if you hover over (then the analyses are shown)
or click on it (then you can access the analyes). |